Repair: Voigtlander Nokton 40/1.4
Tools Needed
Spanner wrench (with flat tips)
Familiarize yourself with the lens diagram.
??Image courtesy of Cosina Japan??
I had to remove the rear optical unit, which comprises of the last four elements held together in a frame.
Removing the rear unit
First, looking at the rear element of the lens, you'll see a retaining ring with two notches (let's refer to this as Ring-Rear). I was lucky; when I turned the ring with the lens spanner, the rear unit unscrewed as a whole.
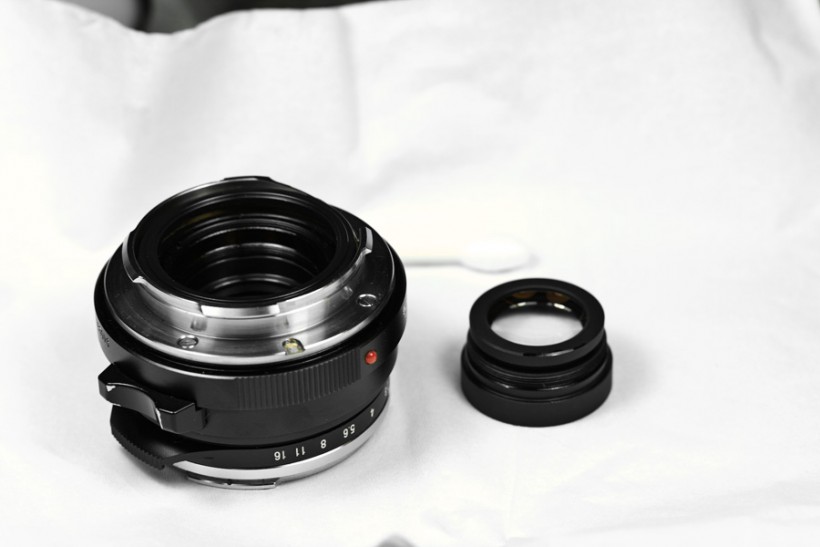
Separating the rear unit
You'll end up with these two pieces. Next, holding the rear unit, unscrew Ring-Rear using the lens spanner. The rear element might or might not fall out. If it doesn't, you can remove it with a little sticky tape. Be careful with it and place it on a clean tissue.
Once that's done, look at the other end of the rear unit, and you will see a retaining ring that has a flat face (call this Ring-Flat). While the ring faces upwards, unscrew it (should not be too tight).
Important: Pay attention to the outside element (in the diagram, fourth from the left). This element is convex on both faces, so make a note that the beveled edge of the element faces outside the unit.

Remove the elements from the frame. Again, these may or may not fall out, and you may use sticky tape if they don't.

This should be the result. From left, top row, Ring-Flat, the frame for the rear unit, and Ring-Rear. Bottom row, element 4, elements 5 and 6 (grouped), element 7 (this is the rear element of the lens). On the far right is the rest of the lens.
Disassembly of the rear unit complete. Do what you want and we'll reassemble the lens.
Reassembly of rear unit
This should be easy. Reverse the disassembly procedure. Carefully replace grouped elements 5 and 6 into the frame. There is an edge inside, so ensure that the elements are seated properly.
Next, replace element 4 atop the outer edge on the frame. Ensure that the orientation is correct, beveled side facing exposed. Screw on Ring-Flat to hold it in place.
Flip the frame around and replace element 7. Ensure it's seated properly then screw in the Ring-Rear using the lens spanner. Ensure that this ring is tight.
The rear unit is now reassembled.
Replace the rear unit
Screw the rear unit back into the lens body. If your lens spanner fits the notched ring snugly, you may use these to make your task a little easier.
Tighten the rear unit, but do not over-tighten.
You are done!
The procedure may be simple, but be very careful not to damage the elements or their coatings.
Always be sure that the screw threads aligned properly during reassembly--you don't want to cross thread them.
Please feel free to contact me if you need help with these instructions. Lastly, don't blame me if you mess up your lens.